Showing posts with label text block - signatures. Show all posts

Monday, March 21, 2011

Finishing it off...

Putting on the Cover


Supplies:

Scissors
PVA glue
Flat brush
Waste paper
Wax paper
Weight


Trim the crash

Carefully line everything up, is the block sqaure in the cover? Brush PVA glue OUT (start in center, brush to edges) Get glue on the top of the crash too. Carefully - VERY carefully roll the cover over and onto the endsheet.
I didn't realize how critical this part is and how difficult. Be VERY particular, because once you've rolled that cover over and onto the endsheet you will not want to lift it back off. Messy, messy and you are more than likely going to tear something.

Flip and repeat to back side. 

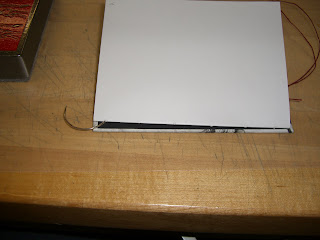
Insert a piece of wax paper between cover and  the loose endsheet. Then, under the wax paper, place a piece of heavier-weight paper. This one is to absorb the moisture so you don't get warping.  Do this to BOTH sides.

Now weight it all down (.more than one weight would ahve been nice), and let dry.


Want to know what's on deck?

Here is sneak peek at my next project! 


Curious? Go here; see if you can guess where I'm headed . . .

Assembling the Cover, Finishing the Signature

We have a bit of finishing to do before we can get to decorating the boards...


Finishing off the Text Block and Assembling the Cover


Supplies:

Crash or Muslin
Finished signature
Waste Paper
End papers
PVA glue
Small brush
Liner Paper
Lined cover boards
Pencil
Weight


Apply PVA glue to the flattened spine of your text block.

Line up crash (or you can use muslin) and glue to the spine of the text block.


Tipping in the endsheets...

The endsheets shown here are already folded in half.

Using the straight edge of a waste paper (the green paper here) apply PVA glue to the exposed edge of the folded endsheet.


Always brush OUT, off the waste paper and onto your surface to be glued.

This prevents glue from being swept underneath the waste paper edge and onto paper you don't want glue on.


Lift off waste paper.


Flip over the end sheet (glue side down)

Lifting up the crash, you don't want it glued down yet, line up and tip in the endsheet.

Repeat process for the second endsheet.
Both endsheets are tipped in and you are ready for the next step...


Applying the Liner to the Cover Boards

We are using this liner inside out.

Fold in the head and foot so it measures the same height as your text block.


Glue down the folded flaps

Round the liner paper over your spine.  Even up both top and bottom.

Line up your cover boards over the liner. Text block is still inside.

Mark with a pencil the glue lines - where your cover boards end and your liner/spine sticks out.


Place wax paper over the crash, you don't want glue on any of the text block yet.

Now brush PVA glue on the liner, adhere the cover boards. Weight and dry.


At some point here you want to trim your endsheets to match your signatures. A metal edged ruler/straight edge and a good blade are highly recommended.


Next: Decorating the Cover

Sunday, March 20, 2011

Rounding the Spine / Bookmaking

Prepping the Boards and Rounding the Spine 

Now that you have your signatures sewn, it's time for the next step.

Supplies:

PVA glue
Sand paper on a sanding block
 (I've used a piece of sandpaper applied to a remnant of a board)
Liner paper (regular white paper)
Cover boards
Your sewn signature
Small brush
Weight
Bone folder

First, you will need to line your boards. Using a PVA mix glue, glue paper liners onto each side of your boards. This paper can be just regular weight printer paper.


When dry you will sand off the excess.
Sanding off is much easier than cutting.


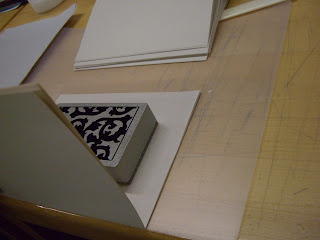
Now place the signature between the boards. Pull out the signatures until they stick out about 1/4 inch. Hold the whole thing with a weight.

Using PVA glue and a small brush, apply glue to the signatures.


You want to get a bit into those round edges, between the signatures.


Rub off excess glue with your thumb. Let dry almost 5 minutes, or until damp but no longer sticky.


 With a bone folder start to flatten those rounded spines.
Here you can see the difference between a flattened section and the other.


Lift and pull the fore-edge of your text block, then roll your thumb over the top of the spine to start to round out the spine. You are trying to get the spine to curve in at the top and bottom (not the head and tail of the book). When you have worked over one side, flip the text block and work the other side. You can use a rubber hammer on larger text blocks. This small one won't show a lot of curve.

Here is the finished rounded spine.


Keep watching...

 Soon: The naked part, or in other words, Decorating the Boards...

Thursday, March 17, 2011

The Naked Book ... an A. Dean Larsen Workshop

I've just finished a pre-conference workshop presented of the A. Dean Larsen Book Collecting Conference. What a great class! Judy is a fabulous teacher, so well prepared, so sincere, so very dedictaed! I look forward to this conference every year.

Today's inspiration came from Christopher McAfee's
Naked Book of the Apocalypse

There are over 80 photos that I took of the whole process.
You don't get them all today.
Today you only get the French Sewing on the signatures.

Watch for upcoming posts:

~Decorating the Cover
     (we used MODELING PASTE and ACRYLICS WASHES!!)
~Rounding the Text Block
~Putting the Cover on the Text Block

... plus a few little how-to's

~Locking a needle onto your thread
~Gluing 'out'

p.s. click on the pictures to see them large, click again to get them really up close.

Supplies
PVA Glue
Bone Folder (or teflon folder)
Paper Piercer
Pencil
Cutting Blade
Brush
Straight Edge ruler, preferrably metal edged
Wax Paper
Waste Paper (so you don't get glue everywhere)
Paper for signatures
Protective mat so you don't ruin your table
Beeswax
Needle and Thread


Fold 4 pieces of paper at a time. This is a signature. First with your fingers, then with the bone folder. Mark all the top corners of each signature with an x.
Use a Sewing Template (EVEN number of holes), set it INSIDE the folded signature and pierce holes in each signature.  


 Hold piercer at a 45 degree angle to pierce
 Stack the signatures


Now flip all the signatures, except one, over to the top of desk. Place weight inside first signature. Take waxed thread (lock the thread on the needle) and starting on the outside pull thread to inside, leaving about a 4 inch tail.


Sew in and out up through all 6 holes in the signature. Pull thread taught but not tight. Tighten by pulling threads straight out the top and bottom of the 'book' so you don't rip your papers. Bone fold over the thread, you want to mold the paper over the thread that is inside the signature.
Place signature 2 on top of first signature. Place weight inside to hold in place. Now go back down the spine.
 LINK the stitches as shown for a nice French stitch.

Tie a square knot with that beginning tail when you get to it.

Pick up the TOP edge of the far side of the linking stitch to get that herring bone look of the French stitch.
Kettle stitch as shown to link the ends of the signatures

Don't forget to rub the bone folder over the signature, it cuts down on the bulk and molds that paper over the threads
Set the next signature on the block, place the weight and continue stitching.

Remember, taught but not tight. Oh, and make sure you haven't left any loose loops inside your signatures.


Kettle stitch again


Another kettle stitch, pull up to tighten. More linking stitches

TWO kettle stitches to finish it off. Cut thread, leaving another 1 inch tail, trim the first tail to about 1 inch as well.


Watch Tomorrow for Rounding the Spine

Tuesday, March 30, 2010

Bookbinding Part 3 - Sewing the Coptic Binding

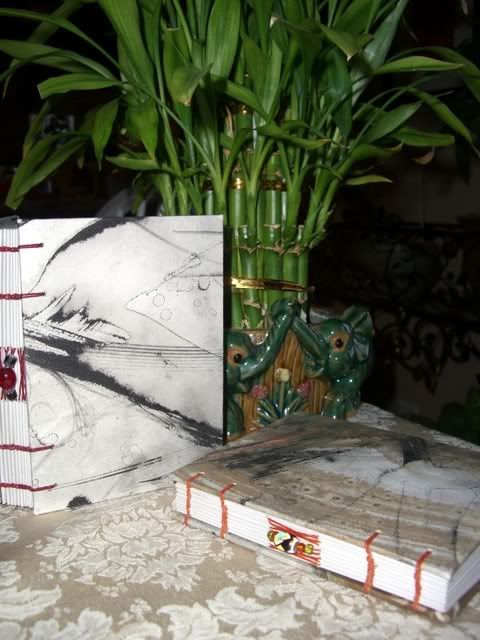
The Finished Product:

Photobucket

Prepare your space:

Stack book covers and text block, spine away from you, in the order they will be sewn.
Top cover on the top. (I had to use my glue bottle to keep it from sliding out). 

Signatures (11) all lined up and arranged so that the punched spine holes line up together.
Top right corners all  lightly marked in pencil.

Beads, 1" worth, on a strip of masking tape ready for you to put on your middle signature.

Bonefolder

3 1/2' of waxed linen thread - cut in half.

Curved needle


- Take the top signature and the front cover. Place them upside down on the edge of the table. Spine towards you.
- From the center of the signature, bring thread out the left hole. Leave a 3-4" tail inside the signature.

- Flip cover and signature over so that the cover is on top and your thread is now on your right.
- Bring thread from outside of cover and down between signature and inside of cover.

- Bring thread out on the right side.
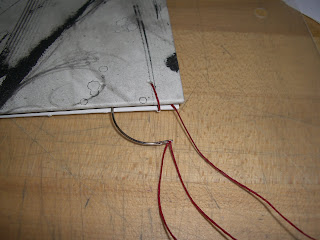
- Insert needle back between cover and signature and then up through the cover to the outside.

- Pull thread up and out of the cover leaving a loop out on the spine.
Hold the loop, tug it towards you firmly, make sure your threads look straight and neat on the inside of your cover.

- Bring thread down through the loop and pull firmly straight down, tightening the loop.
      *Do not pull too hard, it will rip out your signature! (you get three guesses on how I found that one out and two don't count)

- Now go back into the signature, in the SAME hole.

- Move up one hole and come back out to the spine - repeat the inbetween/out and around/up and out with a loop/down through the loop, tighten/back in the same hole.

For this book we then did a French stitch (a long stitch) in the center. These stitches are not connected to the cover. Just take a long outside stitch.

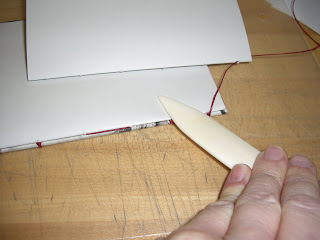
-Once you have gone the length of the book, press with the bonefolder over all the stitched places. This forms the paper around the thread and reduces bulk.


- On the last hole do not go back into the first signature, instead pick up your next signature and go into it. See above illustration

- Place your sewing weight on top of the signatures, but leave your cover up.

- Align your signature papers so they are square.

- In the middle, at this second french (long) stitch you will 'pick up' the bottom long stitch. Just go under it and back into the next hole. You are just connecting the long stitches it creates a herringbone-like pattern.

-At the end of your second signature you will now start linking signatures together with kettle stitches (a tear-drop-like loop that goes down 2 signatures in the right and out the left, then back up and into your same hole)

-Flip over the whole book and keep repeating until you get to your middle signature. ie: If you have 11 signatures, it will be on signature 6 that you do not pick up the long stitch in the center, but instead add about 1" of beads. This beaded stitch will NOT be linked to the lower or the upper long stitches.
* Tip: unthread your needle, roll the flattened waxed thread into a point and thread it into the beads. Re-flatten and re-thread your needle and away you go.

- Repeat until the last signature. On this signature you will repeat the cover-adding stitches, the same way you added the first cover. Tie in the ends with a double then a single kettle stitch.

I need to do a few more books, take a whole lotta photos and add to this - this is not easy! Do try youtube searching for videos, that combined with what I've got should get you started. Oh, and feel free to post questions in the comments ;)

Or, try learning a coptic binding another way... check out these videos I found on Youtube: