
Anyway, I am having so much fun that I am going to post some of the tips here, for everyone :)
August was Wax Paper Applique.
Supplies:
Wax butcher/freezer paper (wax on one side, paper on the other)
Spray Starch
Empty Cereal box
Hot iron, mini craft irons are the best!
Small cheap paintbrush
Applique pattern
Small sharp craft scissors
Fabric for applique pieces and quilt block
Applique pins
Milliners straw needles (these things are the tiniest needles I've EVER seen!)
Needle threader! LOL
Thread
Thread conditioner
1- Take your pattern, trace it onto wax butcher paper. Cut out, but only roughly.
2- With your hot iron, lightly tack the wax paper pattern pieces onto the brown side of the cut open cereal box.
3- Now CAREFULLY, follow the traced pattern exactly, cut the pattern pieces out of the cereal box. Remove wax paper pieces(but save them) from the cardboard shapes.
4- With the hot iron, lightly tack the wax paper pattern pieces to your fabrics. Cut the fabric pattern pieces out, leaving a 1/4" border around the wax paper. Remove wax paper when done.
5- Now, spray starch into the starch lid. Let sit 10 minutes or so. Until the foam goes down and you have liquid. Using the paintbrush, paint starch on the edges of your fabric pattern pieces.
6- Place your fabric pattern pieces face down on the ironing board. Set the coordinating cardboard cereal box pattern pieces on top of the fabric pieces, printed side up. The brown side should be against the fabric's back. With the hot iron, fold the 1/4 seem allowance over the cardboard, the starch and the printed side of the cereal box will help hold the seam allowance down.
7- Turn over and iron the front of the fabric.
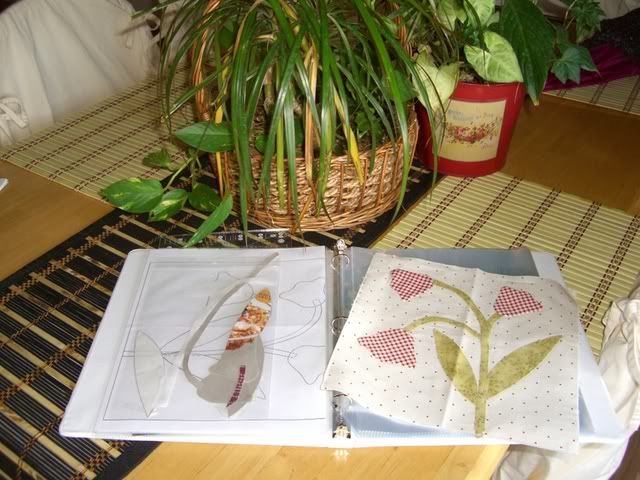
8- When cool, remove cardboard. Now you have perfectly shaped pattern pieces all ready to pin to your block. Perfect for easy easy stitching. Save your cardboard and wax paper pieces in a gallon-size ziplock, just hole punch it and put it in a 3 ring binder so it's easy to use again.
8- When stitching your applique to the quilt block, use a hidden stitch. ONLY use a length of thread that is as long as the measurement of your hand to your elbow. Less tangles, easier stitching.
9- Iron finished block.
Here is my finished applique quilt block...
Now think for a moment...
Can you just imagine using STAMPS to create patterns??!!?! Imagine the possibilities! The endless supply of images. The creative use of supplies you already have. Only have small stamps? No problem, Stamp and enlarge! You can have matching quilts and scrapbook layouts!
Keep watching, next month, I'll post a different applique method.
1 comment:
You continue to amaze me! I also want to say, the pics of Lexy are stunning! she is a beutiful girl, and her on the swing is precious! What camera do you have?
Post a Comment