First, here is a photo of the kit:
* click on photos to enlarge
Supplies -
PVA glue
1" brush
Paperclips
Awl
Pencil
Sewing weight
Ruler
Bone folder
Single-edge blade
3/4" wide measuring board
Sewing template
Text-weight paper for signatures
Paste paper (inside of covers)
Waste papers - to keep a clean surface
Archers watercolor paper (cover)
Cutting mat
Scissors
Waxed linen thread 3 1/2 yards for this little book
Curved needle
Beads (keep them on a piece of masking tape - keeps them from rolling around and getting lost!)
Viewing mat - for finding the sweet spot on your cover paper

- After measuring and punching the holes in your cover board you will want to create a sewing template. This will help line up your text signatures with your cover.
- Take a folded heavier-weight paper that is the exact height that your signatures are going to be, width is not important.
- Fold all your signatures and trim them.
If you don't want them trimmed then your pages will all be slightly different widths.
- Press each signature's fold with a bonefolder.
This book has 5 papers per signature for 10 pages when it's in the book.
If you don't want them trimmed then your pages will all be slightly different widths.
- Press each signature's fold with a bonefolder.
This book has 5 papers per signature for 10 pages when it's in the book.
- Taking each signature individually, place sewing template inside. Paperclip in place - line up top and bottom of template to the pages and then punch.
*small holes, nothing huge is required.
*small holes, nothing huge is required.
- Mark the top corner of each signature - you will want to keep all the signatures lined up with all the top corners together.
For this book we added two centered holes. These will be sewn with a French stitch.
This is the stitch that will hold a 1" stretch of decorative beads.
If you want any easier way - go here to Quiet Fire Design - and buy a piercing cradle.
This is the stitch that will hold a 1" stretch of decorative beads.
If you want any easier way - go here to Quiet Fire Design - and buy a piercing cradle.
- Hold awl/piercer at a 45 degree angle to punch- this puts your hole right in the gutter of the fold.
- Finish off the cover boards by cutting off the 'uglies' - the bumps from your piercing of the holes.
- Use sandpaper to smooth out the last of the bumps.
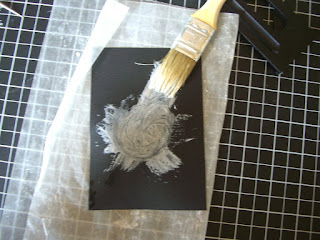
- Get your cover paper. Lay it on some waste paper and glue from the center out.
(make a circle in center and then pull glue out to edges - things go smoother if you glue this way)
(photo is of paste paper, you couldn't see the glue on the white watercolor paper)
- Place the board over the cover paper, line up with registration marks.
- Before you go further - pierce the holes.
- Mark them from the inside, then push through from the outside in.
The wetness of the glue holds the cover paper down inside the holes.
- Flip over and trim cover paper down to 3/4" - - remove waste paper that has glue excess on it.
- Fold over the corner at a 45 degree angle.

- Cut the corner off. Leave about a 1" + 1/2" of the thickness of the cover board's distance from the board edge.
- Apply glue (always glue out to edge of the paper) on the bottom (tail).
- Roll board upright, folding the cover paper over the edge as you go.
- Smooth out inside of glued cover with thumb.
*Tip: Use waste paper wisely - don't scrimp and don't get glue where it's not supposed to be- PVA glue does NOT come off.
- Now repeat for top (head).
- After you've glued the top (head) and bottom (tail), now do the spine and the front edge.
- Press down the mitred corners before glueing spine and front edge.
- When all four edges are glued tap corners with bone folder to soften.
- Punch holes again, this time mark the holes by piercing from the outside in, then completely punch through from the inside out - wrapping the paper into the hole so you don't have bumps.
- Glue in the paste papers, the inside piece.
- Pierce holes again.
- Fold each cover individually in wax paper and press with sewing weight or other weight for 24 hours or until fully dry. The wax paper is to prevent glue seepage from getting on the opposite cover.
...next - sewing a coptic binding, the one needle way.


1 comment:
Post a Comment